

Add a Forecast Time Entry in the CalendarView
- From the Navigation menu select: Time > CalendarViewThis view will display the timesheet in a chronological order. It holds all of the same functions as the standard Day view but offers alternative methods for Merging time entries. You can also drag items to increase / decrease the duration..
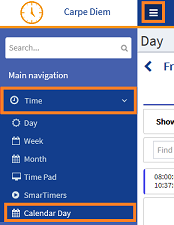
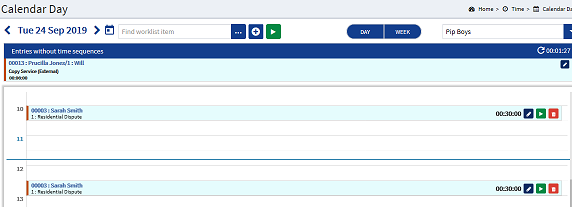
- This will open the CalendarView.
To add a Forecast time entry in the CalendarView, do the following:
- Forecast timeTime in the future that has not yet happened but is planned. This will assist you in forward planning your work and lets your manager know when you are available. Forecast time can be converted into a Time entry when the work is completed. entries can only be created for a date in the future, as such the CalendarView must be displaying a day from tomorrow onwards.
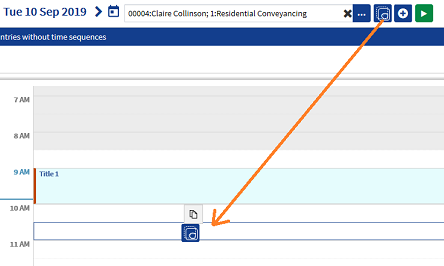
- Click the Add button, this will display a confirmation notification to ask the user if they wish to create a Forecast time entry.
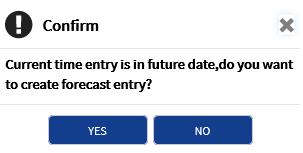
- Click YES to close the message and display the Add Forecast time form.
- The form is identical to the standard Add Time form with the removal of the start / stop time fields.
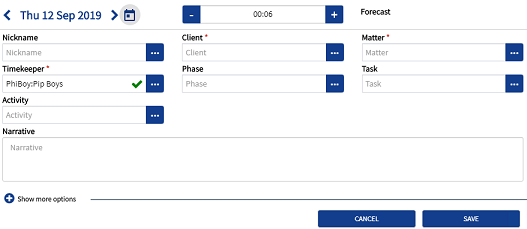
- Once the required fields have been defined, enter a forecast duration or click the +/- buttons to increment accordingly. Only those fields marked with a * are mandatory.
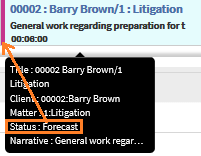
- If you wish to save the Forecast time entry, click the SAVE button. The Forecast time entry is then displayed in the Entries without time sequences section of the CalendarView. The Status can be viewed by hovering over the entry and by the fact it has a pink left edge marker in the view.
- Should the entry not require saving, click the CANCEL button to dismiss it.
- The forecast time entry can simply be converted into a time entry by dragging and dropping it into the CalendarView at the required point of entry. This will then apply a Start and End time to the entry.
- Should the entry be converted in error, it can be forced back into the Forecast status by:
- In the CalendarView, click the delete button for the time entry that has been converted and is to be reverted to Forecast status.

- The view will refresh and the entry will be re-displayed in the Entries without time sequences section.


