

Drag & Drop a Worklist Entry in the CalendarView
To Drag and Drop a Worklist entry to the CalendarView do the following:
- From the Navigation menu select: Time > CalendarViewThis view will display the timesheet in a chronological order. It holds all of the same functions as the standard Day view but offers alternative methods for Merging time entries. You can also drag items to increase / decrease the duration..
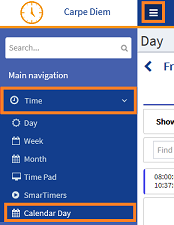
- This will open the CalendarView.
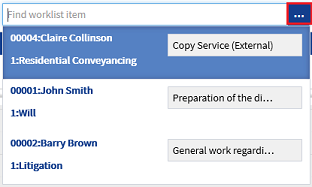
- This process will require the user to have WorklistWorklist items are defined in Tools > Worklist > Management. They allow you to setup a pre-populated time recording entry for regularly used client matters. They also allow you to define a narrative so you can simply enter time by selecting a worklist item and a duration with no other need to select details for the time entry. entries created in Tools > Worklist > Management. In the CalendarView, click the Search Worklist ellipsis button. This will display a list of the active Worklist entries.
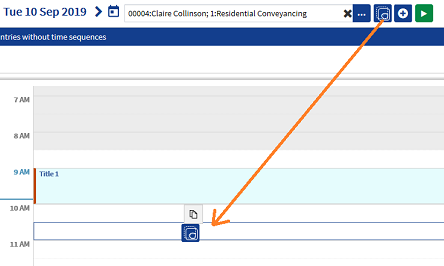
- Click on the required entry to select it. The client matter details are displayed in the field and a Drag and Drop button is then displayed to the right of the Worklist ellipsis button.

- To add the time entry, click and hold on the drag and drop button, then drag it to the time increment in the CalendarView where the start / stop sequence should be captured for the entry. The duration will be set according to the increments set in the CalendarView. (6 minute, 15 minute or 30 minute durations)
 >>>
>>> 
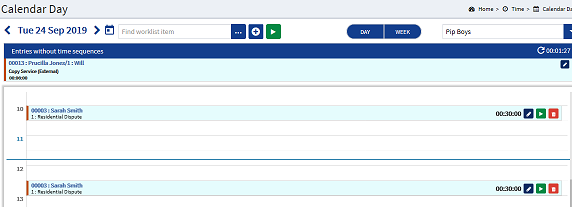
- When the time entry is dropped the screen will auto refresh and the time entry will be displayed according to the defined Worklist item.
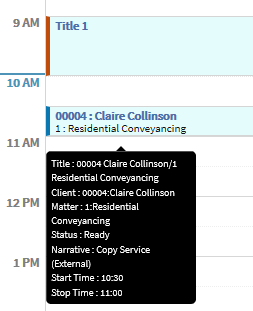
- The time entry can be or hover your cursor over the CalendarView entry to view the details in a pop-up.
