

Run the Calendar Report
To run the Calendar report, do the following:
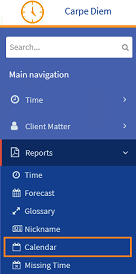
- From the Navigation menu select: Reports > Calendar.
- The Calendar report form is then displayed. Complete the steps below to customize the report details.
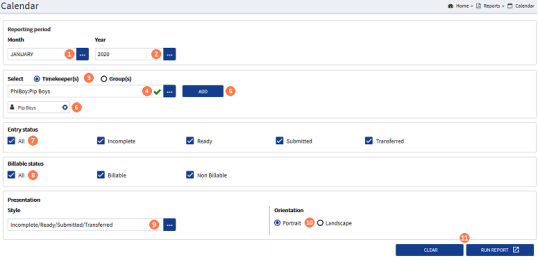
 Reporting Period : Month : On launching the Calendar report form, the period Month is set to the current calendar month. To run the report for an alternative month, click the ellipsis button and select the required month from the pick-list.
 Reporting Period : Year : On launching the Calendar report form, the period Year is set to the current year. To run the report for an alternative year, click the ellipsis button and select the required year from the pick-list.
 Select : Timekeepers / Groups : The radio button defaults to the TimekeeperThis is the person who is working on behalf of the client. They are also known as a Fee Earner. option, to add individual timekeepers to run the report against. If one or more groups that the current user has access to is required, then click the Groups radio button to select those.
 Select : Name : To select either a timekeeper or group name, (depending on option selected in step 3 above) click the ellipsis button to display the pick-list. Click on the name required to select it.
 Select : ADD button : Once the required timekeeper or group name has been selected, click the ADD button to confirm the selection and display the name below the pick-list. Repeat steps 3 to 5 until all names have been selected and confirmed.
 Select : selected names : Where a name is selected in error, click the 'X' in the displayed name to remove it.
 Entry Status : By default the report is set to run for All time entry status types. Where the report is to be run for only specific status types but not all, click the All check-box to remove all selections in this group, then click on the individual check-boxes for the status types required.
 Billable Status : By default the report is set to run for All billable option types. Where the report is to be run for only a specific option type, click the All check-box to remove the all selections in this group, then click on the individual check-boxes for the billable options required.
 Presentation : Style : The selection here will determine the format of the report and the fields displayed. The default option is Incomplete / Ready / Submitted / Transferred. Click the ellipsis button to display the pick-list and click on the required option from the list to select it.
 Presentation : Orientation : By default the report is set to be displayed in Portrait mode. This can be changed to be Landscape by clicking the Landscape radio button.
 CLEAR or RUN REPORT : Click the RUN REPORT button to run the report OR, click the CLEAR button to clear all of the current selections and allow an alternative selection to be applied if required.
The report results are displayed in a new browser tab as a calendar grid. The totals for the month are displayed in a table below the day and week results. (scroll the results tab if they are not in view)
To save the report results for external use, export the results using the export tool in the results tool bar.
