

Run the Missing Time Report
To run the Missing Time report, do the following:
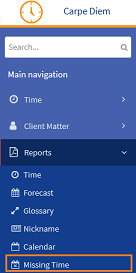
- From the Navigation menu select: Reports > Missing Time.
- The Missing Time report form is then displayed. Complete the steps below to set the report details.
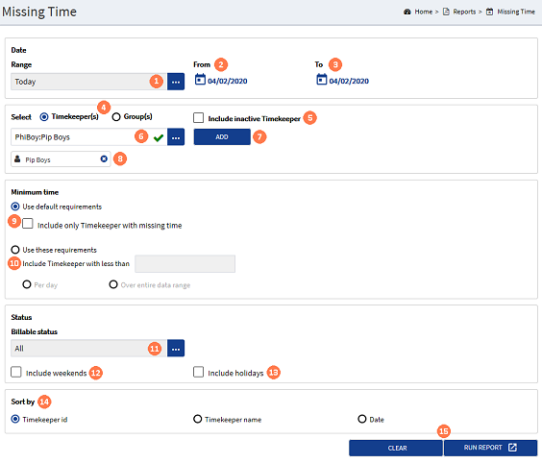
 Date : Range : A date range must be selected to run the report. There are multiple pre-set date ranges that can be selected, or a Custom one can be set. Click the ellipsis button to display the pick-list list of pre-set date ranges. Alternatively, click on the required range or select the CUSTOM option, then manually set the From and To date pickers, allowing a unique date range to be applied (see steps 2 & 3 below).
 Date : From : When the CUSTOM option is selected in the Date Range pick-list, click the date picker button, this will launch the date picker applicable for the browser being used. Click on the date required to select it.
 Date : To : When the CUSTOM option is selected in the Date Range pick list, click the date picker button, this will launch the date picker applicable for the browser being used. Click on the date required to select it.
 Select : Timekeeper / Group : One of these options must be selected for the report to run, click the required radio button to select either Timekeepers or Groups.
 Select : Include inactive Timekeeper : Select this check-box if required.
 Select : Timekeeper / group : Click the ellipsis button to display the list of timekeepers / groups that the current user has access to. Click on the required timekeeperThis is the person who is working on behalf of the client. They are also known as a Fee Earner. / group in the list to select it.
 Select : Add button : Commit the selection by clicking the ADD button, this will display the name below the pick-list. For multiple timekeepers or groups data to be reported, complete steps 6 and 7 until all names are selected and displayed.
 Select : Selected name : Once selected, the Timekeeper / Group name will be displayed below the pick list field. To remove a selection click the 'X' against their name.
 Minimum Time : By default, the option Use default requirements is selected. To change this, click on the Use these requirements radio button. In addition, you can also select the check-box option to Include only Timekeepers with missing time.
 Use these requirements : Where the default options are not selected, the following options are available:
Include Timekeepers with less than 'X' hours : Enter the maximum duration value into the field and then select one of the radio buttons for either: Each day or Over entire date range.
 Billable Status : This option will default to type All. Click the ellipsis button to display the pick-list of selectable options. Click on the status type as required.
 Include weekends : Click this check-box option to include weekend dates within the report results.
 Include holidays : Click this check-box option to include the holiday dates for the timekeeper within the report results.
 Sort By : The Timekeeper id option is selected by default. To change this click on one of the other 2 options.
 Clear / Run Report buttons : Clicking the RUN REPORT button will display the report results in a new browser tab over a sequence of pages, depending on the number of results. Clicking the CLEAR button, will reset the form back to the default options.
Once the report has run it can be saved. To save the report results for external use, export the results using the export tool in the results tool bar.
