

Run the Time Report
To run the Time report, do the following:
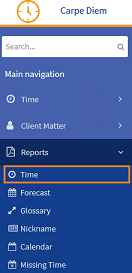
- From the Navigation menu select: Reports > Time.
- The Time report form is then displayed. Complete the steps below to set the report details.
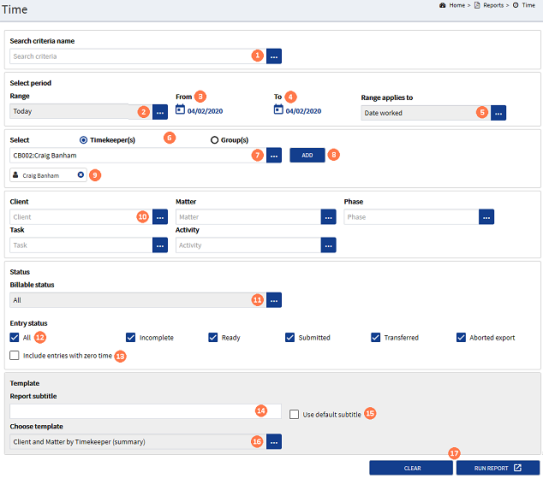
 Search criteria name : Where a report has been previously run and saved, then those reports are listed here. Click the ellipsis button to display the drop-down list of report names. Click on the required entry to select it and populate the Forecast TimeTime in the future that has not yet happened but is planned. This will assist you in forward planning your work and lets your manager know when you are available. Forecast time can be converted into a Time entry when the work is completed. Report fields with the saved criteria.
Where a new report criteria is being defined, as it may be required to run again in the future, then click in the field and enter a name. This will change the RUN REPORT button text to be SAVE and RUN REPORT.
 Select Period : Range : A date range must be selected to run the report. Click the ellipsis button to display the drop-down list of pre-set date ranges, then click on the required range to select it. Alternatively, select the CUSTOM option, then complete steps 4 and 5 below.
 Select Period : From : For a custom range, click the calendar button to display the pop-up calendar. Select the required date that the report range should capture data from.
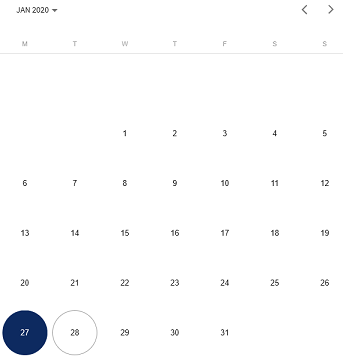
 Select Period : To : For a custom range, click the Calendar button to display the pop-up calendar. Select the required date that the report range should capture data to.
 Select Period : Range applies to : Click the ellipsis button to display the pick-list options. Click on the option that the range should be applied to.
 Select : Timekeeper / Group : The default option is set to TimekeeperThis is the person who is working on behalf of the client. They are also known as a Fee Earner., where the report should be run for a timekeeper group, click the Group option. This will automatically deselect the Timekeeper option.
 Select : Name : Click the ellipsis button to display the pick-list of names associated to the timekeeper or group, that the current user has access to. Click on the required name to select it.
 Select : ADD button : To confirm the name selected, click the ADD button. Multiple names can be selected if required, as such, repeat steps 7 to 9 until all names have been selected and confirmed.
 Select : Selected name : Where a name has been selected in error, click the 'X' in the name displayed below the pick-list.
 Client / Matter / UDF selection : To select a matter, a client must first be selected. Click the ellipsis button in the ClientThis is the person for whom you are working on behalf of and has agreed to your terms of engagement. field to display the pick-list, then click on the required client to select it, then do the same in the MatterThis is the type of engagement that the client has agreed for you to complete for them. Such as Family matters, Conveyancing, Wills, Deeds and Trusts etc. field.
To select options from the UDFUser Defined Fields. These are the fields that are defined by the firm and are configured in AdminWeb by the system administrator.'s, click the ellipsis button to display the pick-list, then click on the required option to select it.
In each of these fields, only a single option can be selected. The more options that you select will reduce the number of results returned in the report. Alternatively, leave all or some of the fields blank to run the report against all client matters.
 Status : Billable status : This field defaults to All billable status, click the ellipsis button to display the pick-list and click on the required option to select it.
 Entry Status : The check-box selections defaults to All. Where only one or some, but not all, of the status types are required for the report, click the All check-box. This will deselect all of the status types. Now click only those status type check-boxes that are required.
 Entry Status : Include entries with zero time : Where forecast time with zero time is required, click this check-box to include those entries in the report results.
 Template : Report subtitle : A custom report subtitle can be entered by the user in this field, rather than using the default one provided.
 Template : Use default subtitle : Click this check-box to display the default subtitle in the report, rather than entering a custom one. This will populate the Report subtitle field with the report subtitle text that will be displayed.
 Template : Choose template : There are a set of defined templates that the report can be run against. Click the ellipsis button to display the pick-list, then click on the required option to select it.
 CLEAR / (SAVE and) RUN REPORT buttons : Once the forecast report criteria has been defined, click the (SAVE and) RUN REPORT button. To run another report click the CLEAR button to clear all of the selected criteria.
Once the report has run it can be saved. To save the report results for external use, export the results using the export tool in the results tool bar.
