

Approve / Reject Time
To Approve time for another user, do the following:
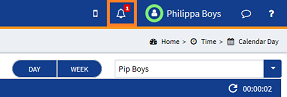
- Where you are an approver (set by your system administrator) you will see that there is a Notifications button in the header section. A red number notification will show that you have pending approvals to complete.
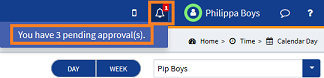
- Click on the Notification button to show the notification in full. This will advise of the number of approvals that are awaiting. Click on this to open the Approvals screen.
- To approve or reject these time entries, do the following:

 Approvals indicator : The red number icons advise you of the number of approvals that are await your attention.
 Group by : Click the ellipsis button to select how to view the approvals, either by TimekeeperThis is the person who is working on behalf of the client. They are also known as a Fee Earner. or ClientThis is the person for whom you are working on behalf of and has agreed to your terms of engagement.-MatterThis is the type of engagement that the client has agreed for you to complete for them. Such as Family matters, Conveyancing, Wills, Deeds and Trusts etc.. By default this is set to Timekeeper.
 Expand and Collapse lists : Where you have more than one timekeeper with approvals waiting, they will be displayed in an accordion list. Click the expand button to open their approvals awaiting list.
 Sort list : The list of timekeepers or client matters can be ordered ascending or descending in order, click the button to sort the list as you require. This function is not required if you are only viewing one timekeeper or client matter list.
 View button : Click the view button to view the time entry details before you approve or reject the entry. It is not possible to edit the entry within this view, it is simply for reviewing. To close the view entry form, click the CANCEL button to return you to the Approvals screen.
 Approve button : Click the approve button for a single entry within the list row. The approval will happen instantly without any confirmation notifications. There is also an APPROVE button that is displayed in a popup screen at the bottom of the form, where you can approve multiple entries at once (see step 8 below).
 Reject button : If you want to reject the time entry, click the reject button for the entry (or to reject multiples where the pop-up menu is displayed at the bottom of the form, see step 8 below. When a rejection is processed the Reason for rejection window is displayed.
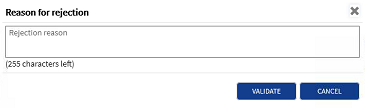
Here you will have to provide the timekeeper with a reason as to why you are rejecting their time entry, this is to assist them in correcting the issues and then to resubmit it. There is a limit of 255 characters in this form. Once you have entered the reason for your rejection, click the VALIDATE button to commit the rejection and remove the entry from the approvals list. The timekeeper will then have notifications to advise that they have rejected time entries, with the reasons for the rejection.
 Select check-box : It is possible to approve or reject multiple time entries at once, this is done by clicking the check-box for each entry that you wish to either approve or reject. On clicking one or more check-boxes to select the entries to either bulk approve or reject, a popup button menu is displayed at the bottom of the form. Click the required button. As with the standard rejection of a single time entry a reason for rejection will need to be provided to the timekeeper, to assist them in correcting any issues found.
If you want to select all of the time entries in the approvals list, simply click the checkbox in the accordion next to the timekeeper or client-matter name. This in turn will select all of the check-boxes in the selected list.
 Item(s) selected : This is the pop-up button menu that is displayed once you select a check-box, for either the timekeeper / client matter or one or more time entries. In addition it advises the number of entries that have been selected.
 Cancel button : Click the CANCEL button to de-select the check-boxes and close the pop-up button menu.
