

Edit a Time Entry
- From the Navigation menu select: Time > Day.

Editing Time entries can be processed from several screens within CDWeb:
- Day view, Week view, CalendarViewThis view will display the timesheet in a chronological order. It holds all of the same functions as the standard Day view but offers alternative methods for Merging time entries. You can also drag items to increase / decrease the duration.
- Custom Select - Time list
- ClientThis is the person for whom you are working on behalf of and has agreed to your terms of engagement. MatterThis is the type of engagement that the client has agreed for you to complete for them. Such as Family matters, Conveyancing, Wills, Deeds and Trusts etc. Tab > Time list
It is possible to quick edit the Duration and the NarrativeThe narrative is a text field that will allow you to enter details about the time entry. This field will accept alpha, numeric ansd some special characters, as well as applying Glossary terms and the spell-check function. It may be that the firm has set this as a compulsory field. for a Time entry directly in the view.
To quick edit the duration, do the following:

- Click the decrement button (-) to reduce the amount of time recorded.
- Click the increment button (+) to increase the amount of time recorded.
For each click the duration will adjust according to the rounding rules applied.
To quick edit the Narrative, do the following:
- Click in the Narrative field. This will expand the field and where appropriate display a scroll bar.

- Once the narrative has been edited, click the SAVE button in the narrative field.

The Narrative can be edited to:
- Modify the existing details
- Add additional content
- Delete or partially delete existing content.
However, where the narrative is edited it must comply to the narrative settings (and rules where defined) in AdminWeb Client. Where these do no comply, then the time entry status may change to INCOMPLETE. In this instance click the EDIT button to view the Narrative validation notification.
Once the narrative changes are complete, they will need to be saved by clicking the SAVE button in the narrative field.

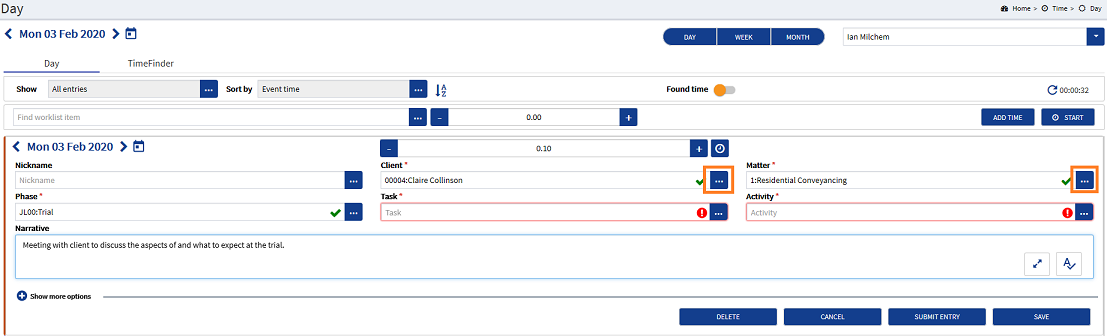
To edit anything else, click the EDIT button in the time entry row.
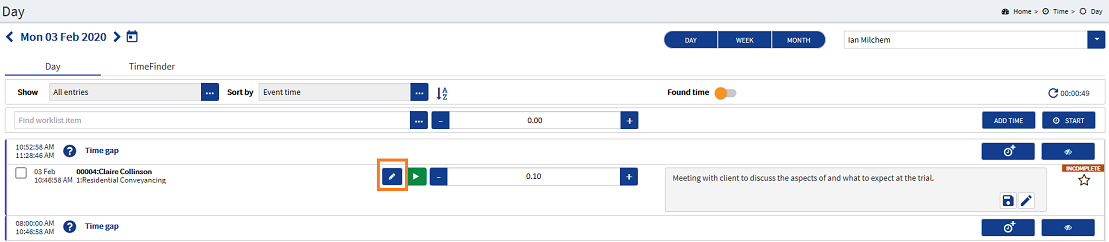
Clicking the EDIT button will launch the Edit time form, and will allow you to edit all fields for that entry.
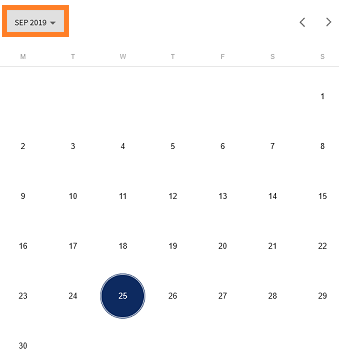
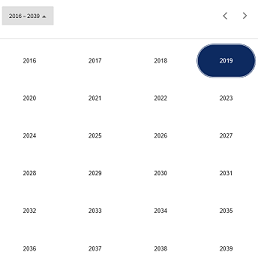
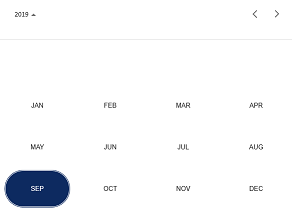
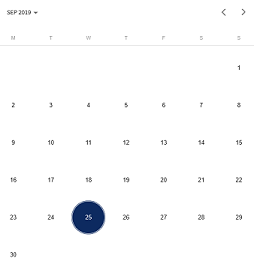
 Editing the Date

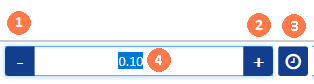
Editing the Duration
 Decrement button : (blue button with a minus icon to the left of the duration value) Clicking this button will reduce the duration in increments of time accordingly. This will be set at either matter, client,
  Increment button : (blue button with a plus icon tot he right of the duration value) Clicking this button will increase the duration in increments of time accordingly. This will be set at either matter, client, timekeeper or global level. The system administrator will be able to advise further.
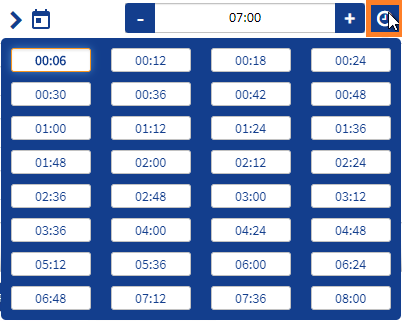
 Grid picker : Select a specific duration of time by selecting from the Grid picker. This is done by clicking the Clock button to the right of the Increment duration button. A pop-up grid will be displayed with pre-defined durations, clicking on the required duration will close the grid and populate the duration field. This duration can then be decremented or incremented if required. The grid will show increments of time according to the rounding rules that have been applied at either matter, client, timekeeper or global level. The system administrator will be able to advise further.
 Duration field : Manually Enter the required duration of time by clicking in the Duration field, delete the existing value and type the required one. Ensure that this is done by applying the correct format, e.g. HH:MM, HH.mm or Units. Where rounding has been applied at either matter, client, timekeeper or global level, the value entered may change on saving or submitting the time entry.
Editing the client matter
Editing a single UDF
