

Run a New Custom Select Search
To run a Custom Select client matter view, do the following:
- From the Navigation menu select: Custom Select.
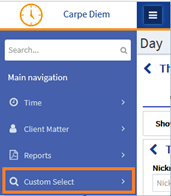
- The Custom Select form is displayed with some default options applied.
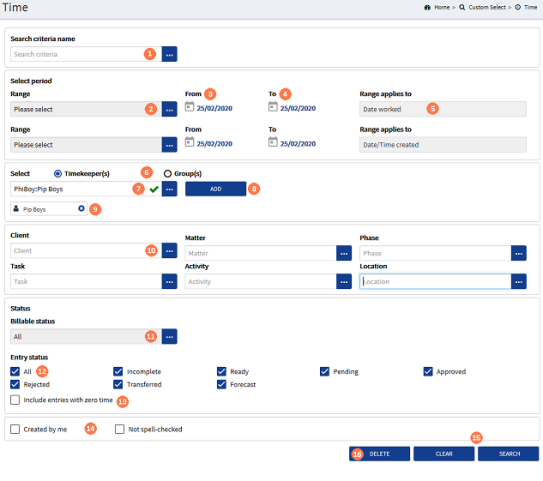
 Search Criteria Name : If the search is to be used again in the future, click in the field and manually type a suitable name. This will be saved so that you can run the same criteria again in the future.
 Select Period Group : RANGE (Applies to Date Worked) : The first RANGE option is used to set the date range that the time entries were worked. Click the ellipsis button to display the pick-list of pre-defined date ranges, click on the required one to select it. You can also set a Custom date range in the Period group. This will enable the From and To date fields (see steps 3 & 4 below).
 FROM : Where the CUSTOM option has been selected in step 2 above, click on the Calendar button to display the date-picker. Click on the required date to select it. This will change the From date to show the date selected. Doing this will set the Select Period option to show the CUSTOM option.
 TO : Where the custom option is selected in the Range, the To date may also need to be selected where you do not wish the range to end on the current day. Click on the Calendar button to display the date-picker then click on the required date to select it. This will change the To date to show the date selected.
 RANGE (Applies to Date / Time Created) : This field is non-maintainable and is there to inform you what you are applying the Range to.
 Select : Timekeeper / Group : By default the form is set to return data for individually selected timekeepers. Alternatively, click the Group(s) radio button to edit this and select timekeepers by group.
 Select : Name : Click the ellipsis button to display the list of TimekeeperThis is the person who is working on behalf of the client. They are also known as a Fee Earner. / Group names, then click on the required name to select it. Multiple names can be selected but only one at a time.
 Select : ADD button : To confirm the name selection click the ADD button. This will display the selected name below the name picker. You can repeat steps 7 & 8 until all of the required names are selected.
 Select : Name Selected : All of the selected names are displayed with a X button to allow you to delete the selection if selected in error. Simply click the X to remove the selection from the list.
 Client : Each of the fields within this group behave in the same way, but some of the fields may be dependant on you selecting an option from another list first. For example, to select a matter you must first select a client.
To select options from these lists. click the ellipsis button to display the pick-list then click on the required option to select it.
 Status : Billable status : By default the Billable Status is set to All. To change this, click the ellipsis button and select an alternative option from the pick-list displayed.
 Status : Entry Status : By default the Entry Status is set to All. To only have one or more but not all of the Entry Status types selected, click the All checkbox to remove all of the ticks from the Entry Status's. Now click only those status types that are required.
 Status : Check-box option : If required select the 'Include entries with zero time' checkbox or these entries will not be captured in the search results returned.
 Created by me / Not spell-checked : The final group allows the user to set the search results to only return time entries that they have created by themselves and / or specifically, entries that have not been spell-checked. These are not selected by default and will required the user to select each check-box where required.
 SEARCH & CLEAR buttons : To run the reports once the criteria has been completed click the SEARCH (or where you have entered a new name in the Search Criteria Name field the SAVE & SEARCH ) button. Alternatively, where you wish to change the selected criteria, you can click the CLEAR button to set the form back to its default settings.
 DELETE button : This button is only displayed where you are running a previously saved search criteria. Clicking this button will permanently delete the saved search and it will no longer be displayed in the Search criteria name pick-list (see step 1 above).
Also See: View the Custom Select Search Results
