Add a Forecast Time Entry
(This will required a Forecast module license.)
can be added in 3 different views (Where enabled by the System Administrator in AdminWeb):
- Time Day view
- Time Week view
- CalendarView
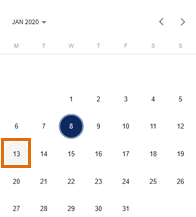
- Select a date in the future from the Calendar picker options.
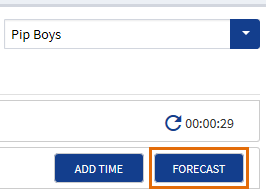
- Click the Forecast button in the timesheet functions.
- This will launch the Add Forecast Time form.
- Complete the form by clicking the required ellipsis button and selecting the required option from the pick-lists.
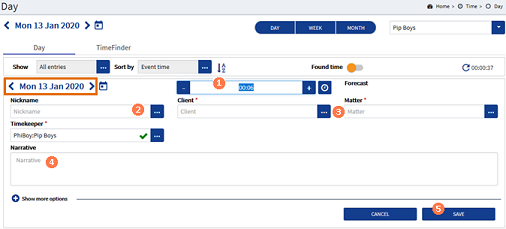
 Duration field : Enter the Forecast duration. This can be done by clicking the increment buttons, selecting a duration from the grid picker or manually typed. Duration field : Enter the Forecast duration. This can be done by clicking the increment buttons, selecting a duration from the grid picker or manually typed.
 Nickname : Click the ellipsis button to display the pick-list of nicknames. Click on the required entry to select it. This will then fully or partially populate the form as per the configured item. OR Nickname : Click the ellipsis button to display the pick-list of nicknames. Click on the required entry to select it. This will then fully or partially populate the form as per the configured item. OR
 Client & Matter : Click the ellipsis buttons for the , and any other required 's. Click on the required pick-list item to select it. Client & Matter : Click the ellipsis buttons for the , and any other required 's. Click on the required pick-list item to select it.
 Narrative : Enter the as required. When you click in this field the glossary and spell-check buttons will be displayed. In most instances the narrative will require spell-checking before the time entry can be submitted. Narrative : Enter the as required. When you click in this field the glossary and spell-check buttons will be displayed. In most instances the narrative will require spell-checking before the time entry can be submitted.
 SAVE / CANCEL buttons : If you wish to save the time entry, click the SAVE button. Alternatively, click the CANCEL button to close the Forecast time form without saving any time. SAVE / CANCEL buttons : If you wish to save the time entry, click the SAVE button. Alternatively, click the CANCEL button to close the Forecast time form without saving any time.
- The time entry is then displayed in the Timeline with a status of Forecast.
| |
An alternative to the nickname or pick-list selection is to select the date and a entry and then click the Forecast button. then follow the above steps from point 4-4.
|
|
- In the Week view, select a week in the Future from the calendar picker options.
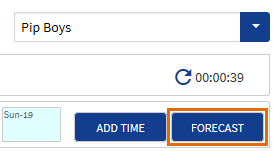
- Click the FORECAST button in the timesheet functions.
- This will launch the Add Forecast Time form for the week selected.
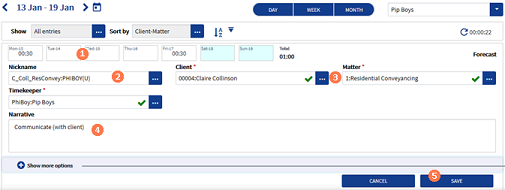
Daily Duration fields : Enter the forecast durations for each day required in the appropriate duration field(s).
Nickname : Click the ellipsis button to display the pick-list of nicknames. Click on the required entry to select it. This will then fully or partially populate the form as per the configured nickname item. OR
Client, Matter & UDF's : Click the ellipsis buttons for the Client, Matter and any other required UDF's. Click on the required item in the list to select it.
Narrative : Enter the narrative as required. When you click in this field the glossary and spell-check buttons will be displayed. In most instances the narrative will require spell-checking before the time entry can be submitted.
SAVE / CANCEL buttons : If you wish to save the entry, click the SAVE button. Alternatively click the CANCEL button to close the Forecast time form without saving any time.
- The time entries are then displayed in the Week view with a status of Forecast.
| |
An alternative to the nickname or pick-list selection is to select the date and a Worklist entry and then click the Forecast button. then follow the above steps from point 4-4.
|
|
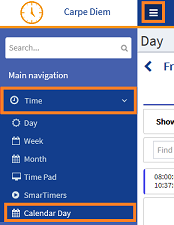
- From the Navigation menu select: Time > .
- This will open the CalendarView.
|
To add a Forecast time entry in the CalendarView, do the following:
- Forecast time entries can only be created for a date in the future, as such the CalendarView must be displaying a day from tomorrow onwards.
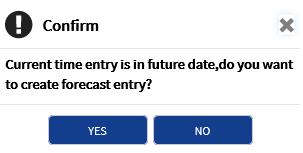
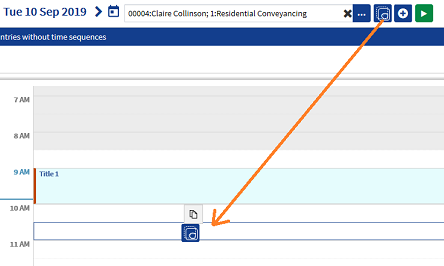
- Click the Add button, this will display a confirmation notification to ask the user if they wish to create a Forecast time entry.
- Click YES to close the message and display the Add Forecast time form.
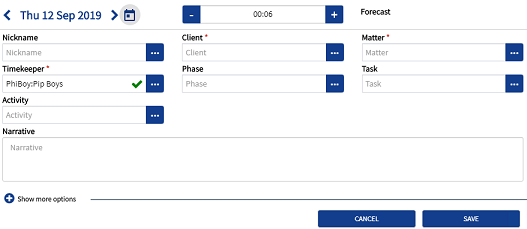
- The form is identical to the standard Add TimeAdd Time form with the removal of the start / stop time fields.
- Once the required fields have been defined, enter a forecast duration or click the +/- buttons to increment accordingly. Only those fields marked with a * are mandatory.
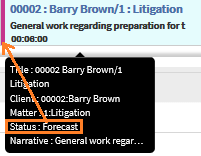
- If you wish to save the Forecast time entry, click the SAVE button. The Forecast time entry is then displayed in the Entries without time sequences section of the CalendarView. The Status can be viewed by hovering over the entry and by the fact it has a pink left edge marker in the view.
- Should the entry not require saving, click the CANCEL button to dismiss it.
- The forecast time entry can simply be converted into a time entry by dragging and dropping it into the CalendarView at the required point of entry. This will then apply a Start and End time to the entry.
- Should the entry be converted in error, it can be forced back into the Forecast status by:
- In the CalendarView, click the delete button for the time entry that has been converted and is to be reverted to Forecast status.
- The view will refresh and the entry will be re-displayed in the Entries without time sequences section.
|


 Adding Forecast time in the CalendarView: