

Adding Time Entries
Adding a new time entry can be done in a number of ways depending on how much data has been setup in the WorklistWorklist items are defined in Tools > Worklist > Management. They allow you to setup a pre-populated time recording entry for regularly used client matters. They also allow you to define a narrative so you can simply enter time by selecting a worklist item and a duration with no other need to select details for the time entry. or the NicknameNicknames are configured in Tools > Nicknames. They allow you to pre-populate a client matter for regularly used time recording entries. They can be fully or partially populated, though there is no narritive defined so you can do this at the point of recording time. You can also use a nickname item to create a Worklist item. lists. Using either of these options can speed up the process of time recording, especially where time is recorded regularly for the same client or client matter. Alternative methods allow for adding time entries manually, converting Time gaps or using the Timer.
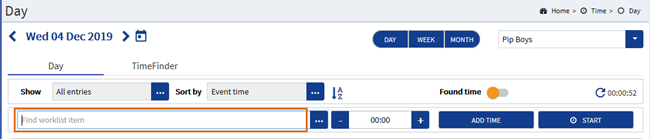
For desktop time recording, it is always advised to have the Worklist enabled. This can be configured
An alternative method is to create nicknames for clients, these can be added
 Basic Time Recording Tips
|
There are some simple steps that need to be completed when recording time, here are some handy tips to speed up the process of time recording:
|

Adding Time Using Worklist Entries
|
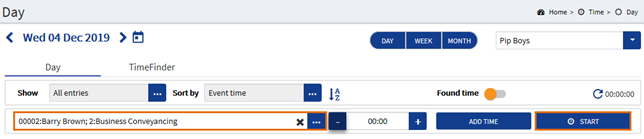
There are 2 methods to apply a Worklist entry as a time entry:
|
|
|
|
 >>>
>>>
 >>>
>>>
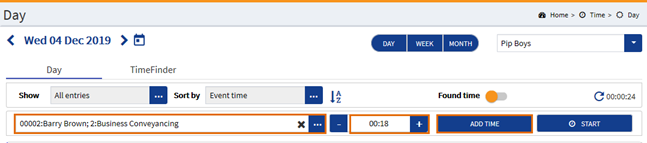 >>>
>>>Select a Listed Worklist Item
|
Manual Time Entry Applying a Nickname
|
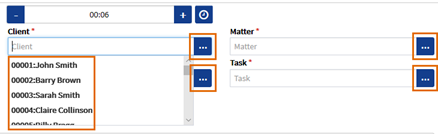
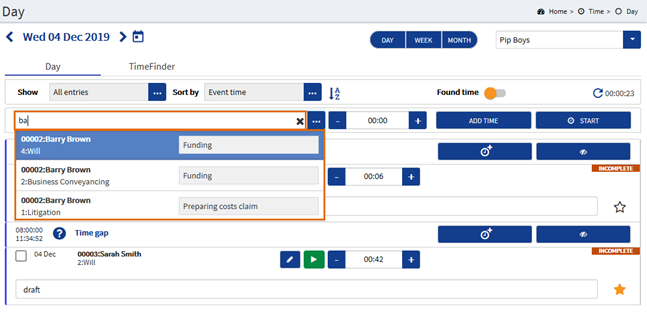
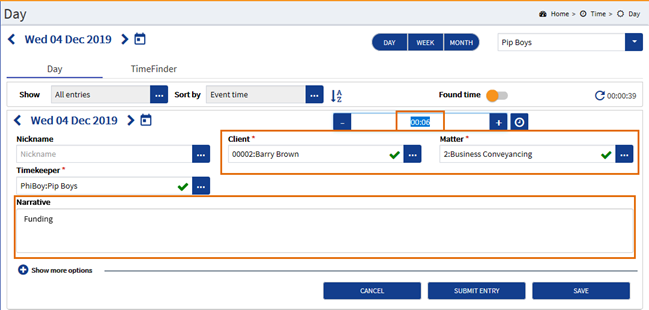
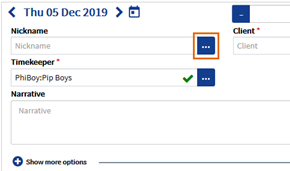
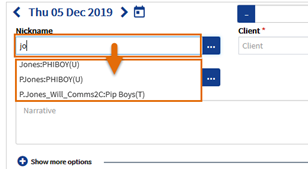
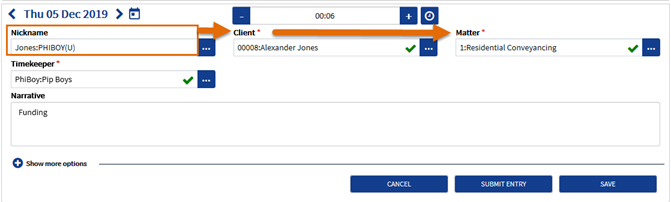
Nicknames allow users to give names to a client and the associated matter, e.g. J.Brown_Will. Selecting this would resolve the nickname in the form and set the client (J Brown) and matter (Will) fields automatically. In some instances where the nickname has been defined further then sub-fields can also be populated. Unlike the Worklist items the narrative cannot be pre-defined, so this will have to be manually added and spell checked on adding the time entry. To add a time entry by applying a Nickname, do the following:
|


Manual Time Entry With No Nickname
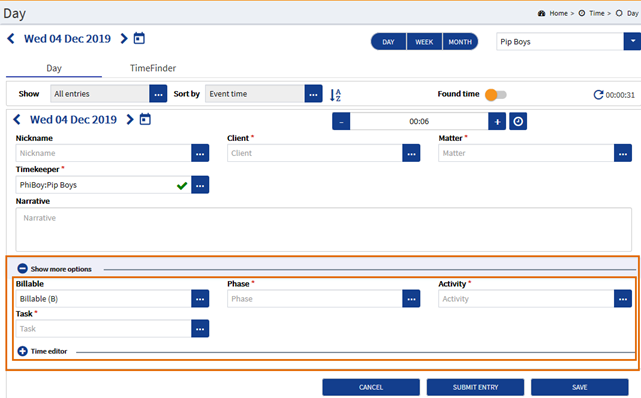
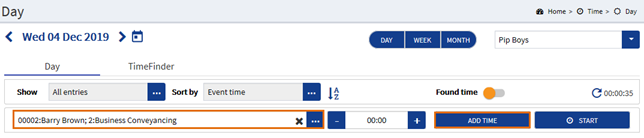
Once all of the fields have been defined, click either the SAVE button which should mark the entry as READY or, click the SUBMIT TIME button to submit the entry as complete. If you don't wish to save the entry, click the CANCEL button to close the form without saving. |

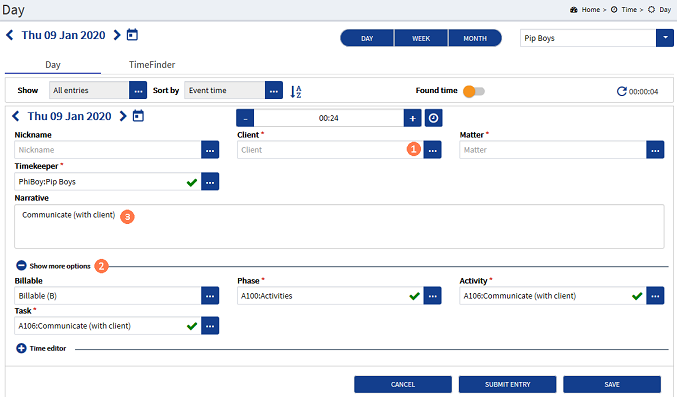
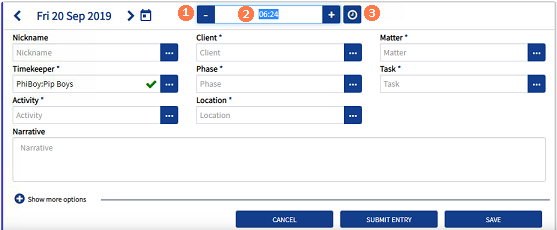
 Pick-lists : To select each field, click the ellipsis button to display the pick-list, then scroll the list and click on the relevant item to select it. (Each of the fields marked with a red asterisks (
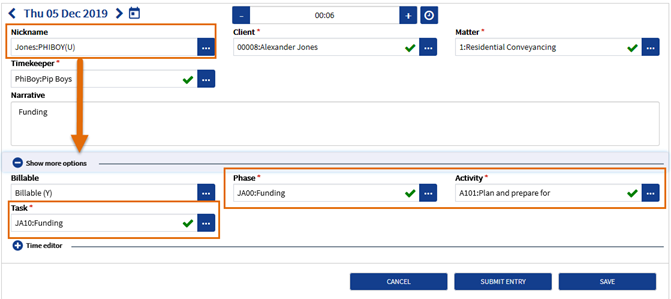
 Show more options : Some fields may be displayed in the Show more options section in accordance with the users selections
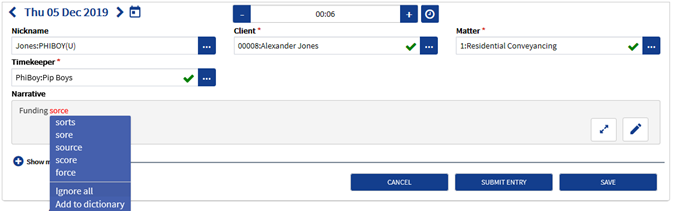
  Narrative : In the Narrative field, enter the relevant details,
 Converting a Time Gap to Recorded Time
|
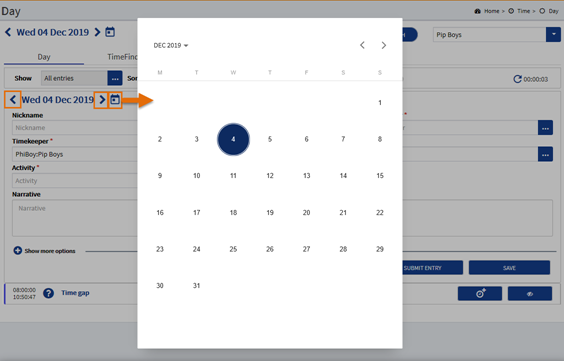
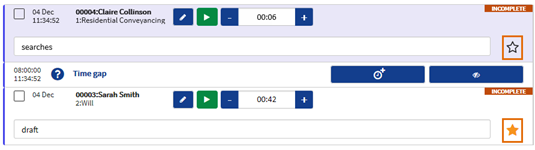
Time gaps are only displayed where they are enabled and configured By default the Time gaps are enabled and set to insert an entry in the Timesheet where nothing has been recorded for a 15* minute period since the last recorded time entry.
To convert a time gap to be a time entry, do the following:
|


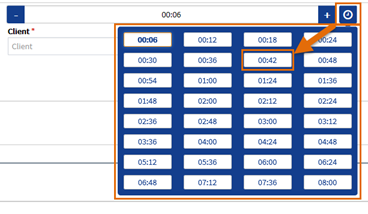
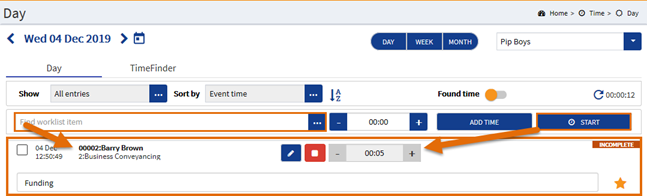
Time Recording Via a Timer
|
The timer can be launched in the time sheet with or without any client details defined via the Worklist.
|


 to record further activities that are performed for that client matter throughout the day. This saves adding additional time entries to the time sheet. It allows for real-time time recording, (this is known as RAW time).
