

Setup Intelligent Time
To Configure intelligent time to allow time entries to be added via the TimePad, do the following:
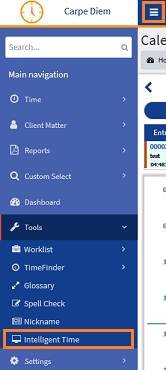
- From the Navigation menu select: Tools > Intelligent time.
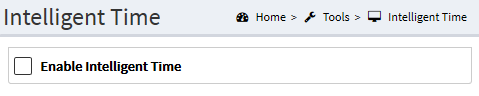
- In the Intelligent Time form, ensure that the Enable Intelligent Time checkbox is selected. This will display the form fields, allowing the Intelligent Time to be configured and time entries to be created in the TimePadThis view allows you to create time entries using plain text and trigger words that are defined in Settings > Intelligent time. You can create multiple time entries at once and review them before saving them to the timesheet..
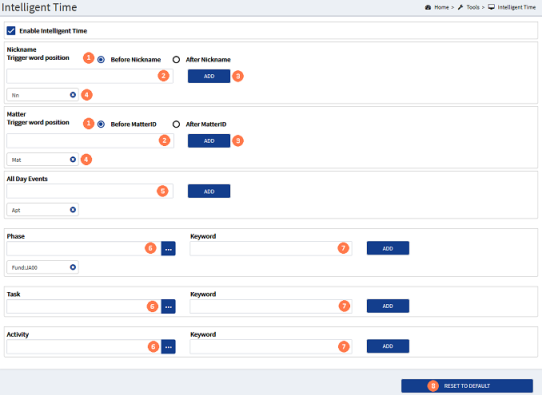
 Nickname / Matter : Trigger word position : Click on the required radio button option, this will define the order you enter the Trigger Word in the Time Pad.
The options are:
- Before the NicknameNicknames are configured in Tools > Nicknames. They allow you to pre-populate a client matter for regularly used time recording entries. They can be fully or partially populated, though there is no narritive defined so you can do this at the point of recording time. You can also use a nickname item to create a Worklist item. / MatterThis is the type of engagement that the client has agreed for you to complete for them. Such as Family matters, Conveyancing, Wills, Deeds and Trusts etc.
- After the Nickname / Matter
 Nickname / Matter : Name field : Enter the text that you will use as the trigger word in the TimePad. For example : Mat / Matter / Case / File.
 Nickname / Matter : ADD button : Click the ADD button to commit the defined trigger word and display it below the trigger word position field. For example : Nick / Nn / Nname.
 Nickname / Matter : Defined Nickname trigger : Each defined trigger word is displayed, it can be deleted by clicking the 'X' next to the defined name where it is not required.
 All Day Event : Define Follow steps 3, 4 and 5 above to define the trigger word for an All Day Event time entry.
 UDF Pick-list : All of the UDFUser Defined Fields. These are the fields that are defined by the firm and are configured in AdminWeb by the system administrator.'s can be defined by clicking the ellipsis button and selecting an entry from the pick-list displayed.
 UDF Keyword : To complete the UDF's definition follow steps 3, 4 and 5 above to define the trigger word for each. For example : cwc (call with client) / ComCli (Communicate with client)
 Reset to defaults button : Where you wish to delete all of the defined trigger words, click the Rest to defaults button.
On closing the form the Intelligent Time trigger words are all automatically saved and the user can then add time entries using the TimePad.
