

Edit Association Rules
To edit an Association rule, do the following:
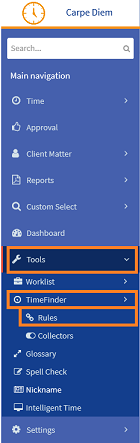
- From the Navigation menu select: Tools > TimeFinder > Rules.
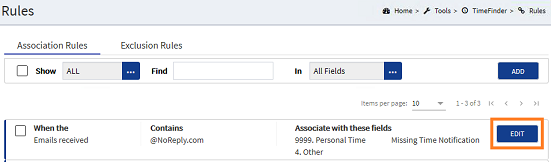
- The Association rule form is then displayed. Click the EDIT button to view the association rule in edit mode.
- The Original association rule form is displayed with the current options displayed. Complete the steps below to edit an association rule:
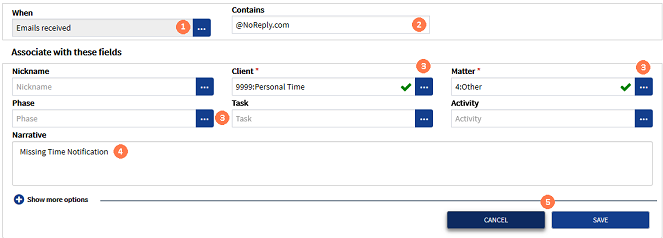
 When* : To change the type of association, click the ellipsis button to display the pick-list and then click on the required type to select it.
 Contains* : To change the details that the rule is associating to, click in the filed and edit the details as required.
 Client* / Matter / UDFs : To edit any of these details, click the ellipsis button to display the pick-list, then click on the required option to select it. A ClientThis is the person for whom you are working on behalf of and has agreed to your terms of engagement. is required at a minimum. Any other options can be removed if not required.
 Narrative : A narrativeThe narrative is a text field that will allow you to enter details about the time entry. This field will accept alpha, numeric ansd some special characters, as well as applying Glossary terms and the spell-check function. It may be that the firm has set this as a compulsory field. can be edited, added or deleted by clicking in the field and editing as required. Glossary items can also be used here. It is advised to spell-check the narrative once complete.
 CANCEL / SAVE buttons : Click the SAVE button to save the changes or, click the CANCEL button to reset the form back to the original association details.
* Required fields
