

Add a Time Entry with a Worklist Entry and Timer Button in the CalendarView
To use the Timer button with a Worklist entry to the CalendarView do the following:
- This process will require the user to have WorklistWorklist items are defined in Tools > Worklist > Management. They allow you to setup a pre-populated time recording entry for regularly used client matters. They also allow you to define a narrative so you can simply enter time by selecting a worklist item and a duration with no other need to select details for the time entry. entries created in Tools > Worklist > Management. In the CalendarViewThis view will display the timesheet in a chronological order. It holds all of the same functions as the standard Day view but offers alternative methods for Merging time entries. You can also drag items to increase / decrease the duration. these entries can be accessed by clicking the Search Worklist ellipsis button. this will display a list of the active Worklist entries.
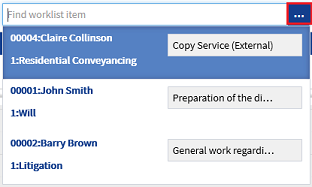
- Click on the required entry to select it. (The client matter details are displayed in the field and a drag and drop button is then displayed to the right of the Worklist ellipsis button). The Timer button is the green button and is only active when you are viewing today in the CalendarView.

- To add the Worklist timer entry, click the Timer button (see image above).
- When you click on the Timer button, an entry is displayed in red in the CalendarView with an active timer displayed. Notice that the client and matter details are set for the entry as they have been applied from the Worklist entry.

- The entry can be edited as the timer is running by clicking the Edit button. See the Basic Timer Entry topic on how to do this.

- Once the timer has accrued the required time it can be stopped by clicking the STOP button in the view.

