

Dashboard : Tracking Tab
The Dashboard Tracking tab shows your activity over the current calendar month, previous calendar month and previous 10 calendar months. The data is displayed over a number of charts and split over two groups:
The Overview section shows 3 block charts, these show your time by status. The Timekeeper section allows you to view the totals from the block charts for a specific status type by clicking on the (View entries) link in the Overview section.
To view the Tracking tab, do the following:
- From the Navigation menu select: Dashboard.
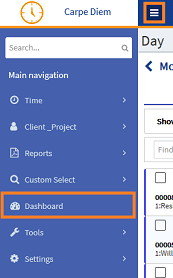
- This will open the Dashboard view.
![]()
- Select the timekeepers and then click on the Tracking tab.
To view the Tracking tab details, do the following:
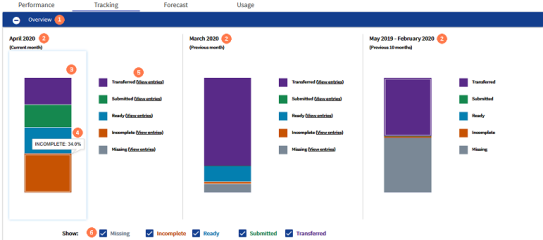
 Overview accordion : Click the Overview expand button to show your time entry status block charts.
 Chart label : Advises which month or period the block chart represents.
 Block chart : The chart displays the percentage of your month totals according to the entry status.
 On hover : You can hover the cursor over each block colour to view the percentage.
 View entries links : If you click on any of the (View entries) links in this section, the Timekeeper accordion will expand to display the values for the status type for each timekeeper in the table.
 Show : If you click the check-boxes to remove the tick, the status will be removed from the block chart and the View entries links where displayed.
To view the Timekeepers section, do the following:
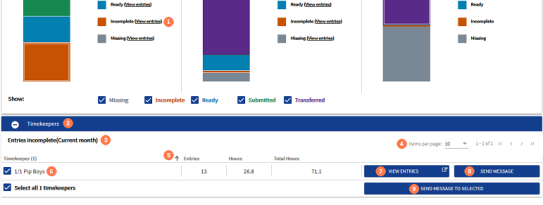
View entries link : You can click on the link text where displayed in the block charts and this will open the Timekeeper accordion and set the results in the table for the time entry status type.
Timekeepers accordion : You can show the accordion details by clicking the expand button but you must click on one of the View entries link text first or this section will remain blank.
Link entries type : Label to show you what data is being displayed.
Paging : Where you have more than 10 timekeepers selected you can change the view to show 20,50 or 100 rows. Alternatively you can page through the results using the < > buttons one page at a time. Alternatively you to jump to the first and last pages of results by clicking the |< and >| buttons.
Table of results : The results show each timekeepers results for the time entry status types per row. You can order the list ascending or descending by clicking on the arrow in the timekeeper name column header.
Select timekeeper : Where you select a timekeeper check-box the SEND MESSAGE TO SELECTED button will enable (as long as this is configured in AdminWeb).
 VIEW ENTRIES button : Clicking this button will show the entries that you have created for the selected period in a pop-up window
 SEND MESSAGE button : This button will only be enabled where your system administrator has setup the email for each user in AdminWeb. Click this button if you wish to send other timekeepers an email regarding their time records.
 SEND MESSAGE TO SELECTED button : Click this button if you wish to send the same message to multiple selected timekeepers regarding their time recording.
Now see :
Dashboard : Setting the Timekeeper
