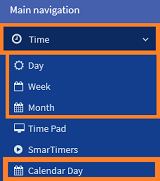
- In the Navigation Menu select: Time > Day.
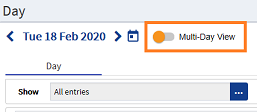
- In the Day view, to the right of the current day selected, click the Multi-day view button.
- This will toggle the button to be Day view, so that you can go back to the standard Day view.
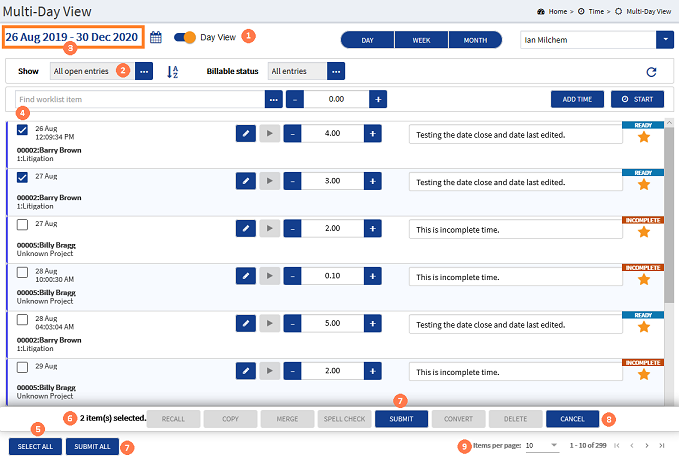
 DayView button : In the Multi-day View, slide this button to switch back to the . DayView button : In the Multi-day View, slide this button to switch back to the .
 Show : Select the All Open Entries option to show all of the timekeepers Incomplete and Ready time entries. Show : Select the All Open Entries option to show all of the timekeepers Incomplete and Ready time entries.
 Date Range : When the All Open entries option is selected, the date range will display with a From date as the oldest open time entry, and the To date with the newest open time entry. It is possible to change the range displayed by clicking on the Calendar button Date Range : When the All Open entries option is selected, the date range will display with a From date as the oldest open time entry, and the To date with the newest open time entry. It is possible to change the range displayed by clicking on the Calendar button  . This will display the calendar date picker pop-up screen. . This will display the calendar date picker pop-up screen.
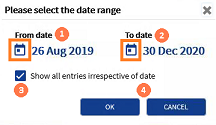
From button : Click the button to show the calendar date picker form. Scroll through the months and click on the date required to show open time entries From.
To button : Click the button to show the calendar date picker form. Scroll through the months and click on the date required to show open time entries To.
Check-box : This check-box is selected by default and will capture your oldest to newest open time entries regardless of the From and To dates set.
 OK / CANCEL buttons : Click OK to apply the date range, or click CANCEL to rest the date-picker dates to those set previously. OK / CANCEL buttons : Click OK to apply the date range, or click CANCEL to rest the date-picker dates to those set previously.
Selected time entry check-box : Where a time entry is selected, the pop-up timesheet menu is displayed at the bottom of the form. A time entry must be selected to enable the Submit time process to run. Only those entries which pass validation will be submitted.
 SELECT ALL button : Click this button if you wish to submit all of the time entries that are displayed on screen. This in turn will select the check-box for all of the time entries on screen. SELECT ALL button : Click this button if you wish to submit all of the time entries that are displayed on screen. This in turn will select the check-box for all of the time entries on screen.
 Selected items : Where you have selected individual check-boxes rather than applying the Select All option, the text advises how many time entries you have selected in the view for submitting. Selected items : Where you have selected individual check-boxes rather than applying the Select All option, the text advises how many time entries you have selected in the view for submitting.
 SUBMIT / SUBMIT ALL button : Click this button if you wish to submit all of the selected time entries on screen. This process will run and perform background validations, to ensure each record meets the minimum requirements to be classed as complete. Where the entries pass validation, each submitted entry status will up-date after the next synchronisation. SUBMIT / SUBMIT ALL button : Click this button if you wish to submit all of the selected time entries on screen. This process will run and perform background validations, to ensure each record meets the minimum requirements to be classed as complete. Where the entries pass validation, each submitted entry status will up-date after the next synchronisation.
 CANCEL button : Click the CANCEL button if you want to de-select all of the check-boxes and close the pop-up menu. CANCEL button : Click the CANCEL button if you want to de-select all of the check-boxes and close the pop-up menu.
 Paging : You can edit the number of entries that are displayed on each page. Paging : You can edit the number of entries that are displayed on each page.
The default is set to 10. Click the down arrow to select an alternative option of 20, 50 or 100.
To scroll through the pages 1 by 1, click the < and > arrows. To jump to page 1, click the |< arrow or to jump to the last page, click the >| arrow.
|